Email Setup for Outlook 2016

Email Setup for Outlook 2016

The following instructions will guide you through the step-by-step process of adding a secure email account to Outlook 2016 for Windows 10.

ACCOUNT SETTINGS

  • Account type: IMAP
  • Incoming mail server: mail.invisibleink.com
  • Outgoing mail server: mail.invisibleink.com
  • Username: you@yourdomain.com (full email address, all lowercase)

VIEW SETUP GUIDE

OPTIMIZING OUTLOOK

  1. Show missing folders
  2. Add an Image to your Outlook Email Signature
  3. Delete an Email Stuck in Your Outbox
  4. Setting up an Email Archive
  5. Automatically Archive Sent Messages

Posted October 01, 2018

Details

Step 1: Click the File menu in the upper lefthand corner of Outlook and choose Info > Add Account.
Step 2: Enter your email address and click Advanced Options. Select "Let me set up my account manually", then click Connect.
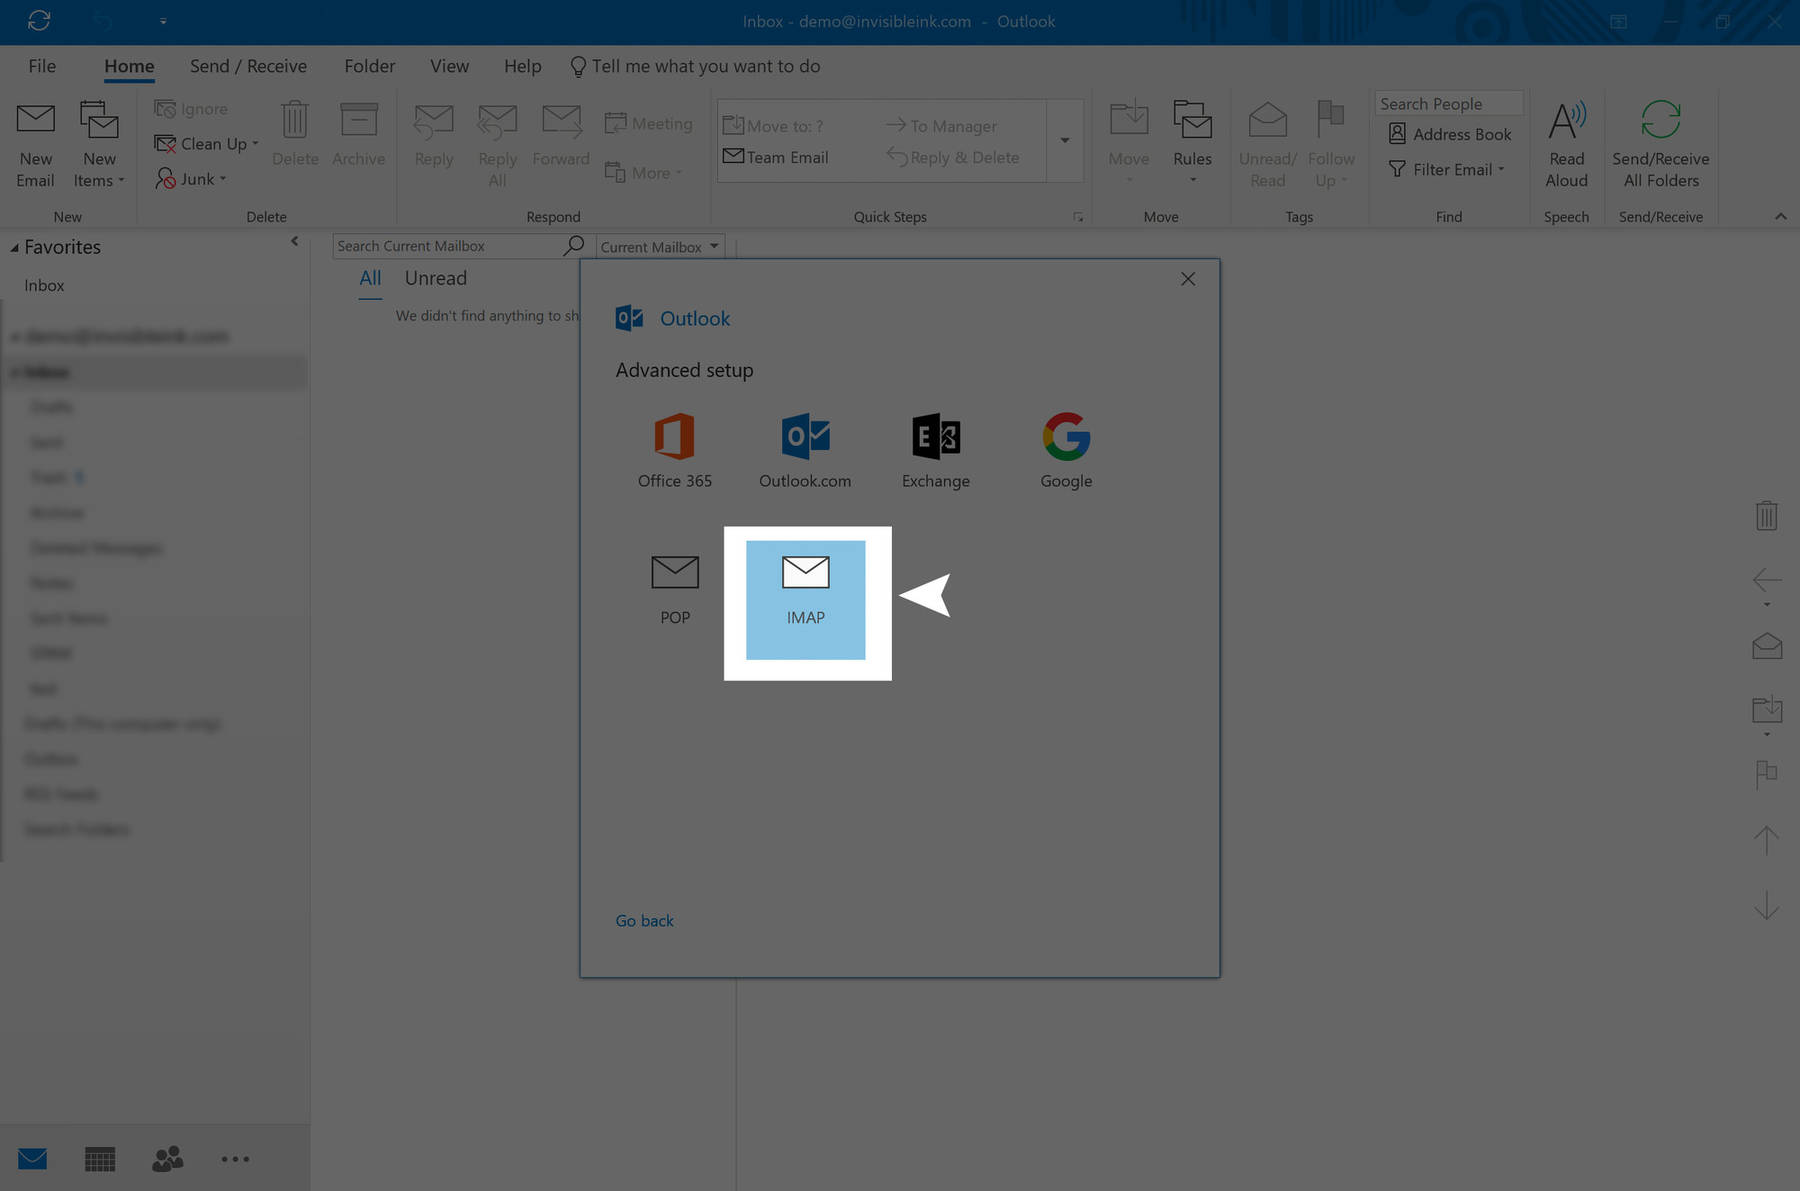
Step 3: When the Advanced Setup screen appears, select IMAP from the list of choices.
Step 4: Enter mail.invisibleink.com for the Incoming and Outgoing mail server address. Use SSL/TLS for the Incoming encryption method with Port 993, and Auto with port 587 for Outgoing mail. Click Next to proceed.
Step 5: Enter your password, then click Connect.
Step 6: Your new account is almost ready to go. Right-click on the Inbox for your new account and choose IMAP Folders.
Step 7: From the IMAP folder dialog box, uncheck the box next to "When displaying hierarchy in Outlook, show only the subscribed folders." Click Apply to save the changes, the click OK to close the IMAP Folders window. Click Send/Receive all folders to check your new account.
[?]